| Mar 16, 2022 |
|
|
|
(Nanowerk News) Transparent objects have their drawbacks: It is not without reason that we have stickers of birds’ silhouettes on big glass windows in order to protect their real-life conspecifics from colliding with the transparent barrier. Just as these animals have difficulties recognizing transparent surfaces, robots are also limited in their capabilities: They cannot “see” glass or other so-called “uncooperative surfaces” – i.e., surfaces that are glossy metal, extremely reflective, or jet-black.
|
|
Especially in an industrial environment, this has been impeding the use of robots in the past. Many projects of automatization stagnate because uncooperative surfaces could only be detected too slowly or too inaccurately in 3D measurement.
|
Thermographic 3D sensor makes transparent objects visible to robots for the first time
|
|
A new 3D measurement technique, developed by researchers at Fraunhofer IOF last year, solves this problem: The “MWIR 3D Sensor” – also called “Glass360Dgree” – can detect objects with reflective or light-absorbing surfaces spatially and reliably for the first time. For this purpose, the system combines infrared laser projection and thermography: After locally heating up the object to be measured, two thermal imaging cameras determine the resulting temperature distribution on the object’s surface. Contrary to conventionally used sensors, the newly developed system does not require additional measurement aids or special, temporarily applied markings, for example in the form of (spray) paint.
|
 |
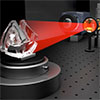
| ‘Glass360Dgree’ visualization of the 3D scanning process. (Image: Fraunhofer IOF)
|
High measurement speed for applications in large-scale industrial processes
|
|
Production processes are often about speed combined with high quality. This means: The more work steps a system can perform per minute without producing defective products, the more profitable is the production. The researchers at Fraunhofer IOF have taken this self-image of industry as an opportunity to adapt “Glass360Dgree” to various production scenarios. In recent months, the researchers from Jena have succeeded in increasing the measurement speed accordingly and optimizing the parameters of the measurement field.
|
|
“Our research group has been cooperating for years with companies from a wide range of production fields,” explains Dr. Stefan Heist, head of the “3D Sensors” research group at Fraunhofer IOF. “Among them are companies from semiconductor manufacturing, the automotive industry and aviation. We looked at joint projects from the past and analyzed how our 3D glass sensor could achieve better results than conventional sensors in various application scenarios,” explains the researcher, who has been working vigorously on new methods for 3D measurement for years. “We were able to identify three key starting points to make our system ready for potential use in a large-scale industrial manufacturing facility.”
|
|
The team found the ideal balance between the level of detail needed in resolution and the duration of a measurement. They also investigated various options for the optical setup of their 3D sensor in order to variably adapt the measurement field to the task at hand and the space available within a manufacturing plant.
|
|
In addition, the team led by Dr. Stefan Heist and Martin Landmann, also researcher at Fraunhofer IOF, worked closely with researchers from the Ilmenau University of Technology to optimize the data processing of their measurement system. The team from Ilmenau succeeded in efficiently deriving the active control of a robot and its respective tools from the obtained measurement data.
|
A new dimension in flexibility and diversity
|
|
With its great flexibility and unprecedented versatility in the properties of the objects to be scanned, “Glass360Dgree” opens up completely new possibilities in the automation of industrial processes as well as in product design.
|
|
The thermographic 3D sensor uses thermal radiation and imaging for 3D detection. A high-energy CO2 laser and a mobile optical setup with special lenses project a line moving in several steps over the measured object in fractions of a second. Throughout the measurement, the object absorbs the energy of the laser light and emits it clearly visible to the two highly sensitive thermal imaging cameras.
|
|
Special software developed at Fraunhofer IOF analyzes the images of the heat signature left by the narrow infrared line on the object for a short time. The software uses the two differing viewing angles and the resulting deformation in the recorded fringe pattern to reconstruct the spatial coordinates. It then merges the data into the exact dimensions of the measured object. The thermal energy introduced for the 3D analysis is so low that the object is not damaged: The temperature difference between heated and non-heated surfaces is typically less than 3 °C.
|
|
“Glass360Dgree” will be presented by Fraunhofer IOF to a specialist audience interested in automation and metrology at the German “Hannover Messe” at the Fraunhofer joint booth in Hall 5, Stand A06 from May 30 to June 2, 2022, and at “Control”, the international trade fair for quality assurance, from May 3 to 6, 2022.
|


